Uploading Reports
After you successfully generated coverage reports from your workflow tests, you usually want to upload them to FlowCov.io to explore the data and share it with your colleagues. In this document, we will outline the steps required to do so.
Create a FlowCov account
In order to use FlowCov, you need to create an account. It's free and you don't need to provide your credit card information.
To create a new FlowCov account, open our app. You will be redirected to the login page. On the bottom, click on Sign Up, enter your email address and the password you want to use and click Next. You will receive an email asking you to confirm your account. Once you've done this, you can proceed to the next step.
Creating a repository
FlowCov organizes coverage reports within repositories, mirroring the known workflow from using Git.
To create a new repository, open our app and click on Add Repository. Enter the name and the full URL where your Git repository is available. Internal repositories are also supported, as we currently only use this URL to generate the correct links to your commits.
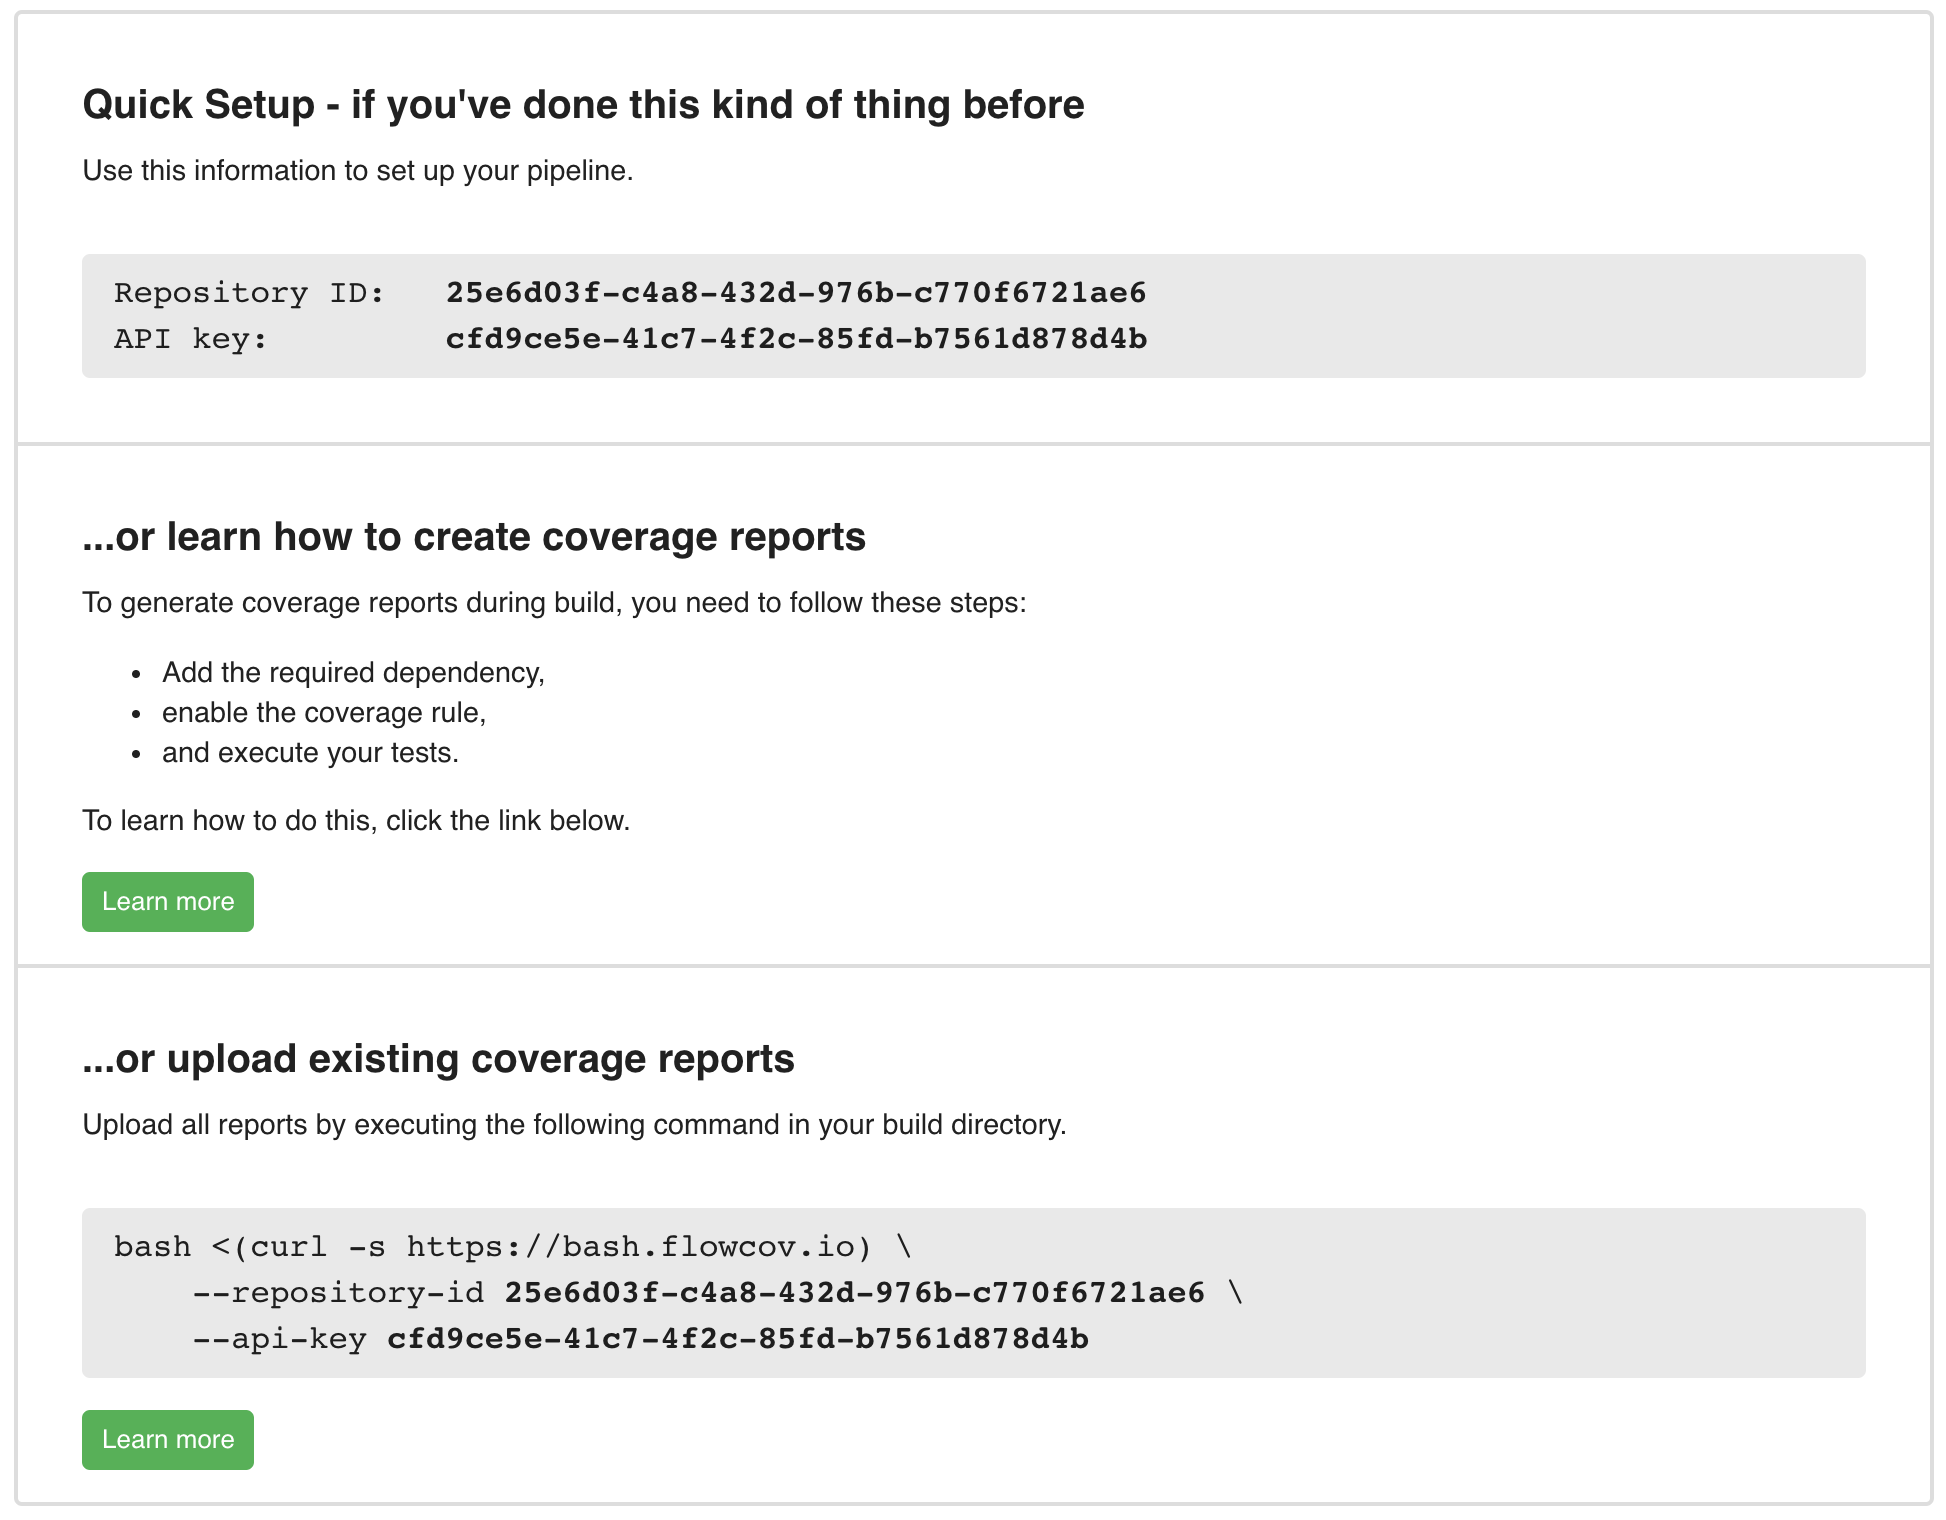
Once you've done that, you will see your Repository ID and API key. You will need these in the next step to launch the upload script.
important
Treat your API key with special care, as it is tied to your user account and grants upload privileges on all repositories you have access to. If you think your API key has been compromised, click on the Settings Icon in the navigation bar, select Reset API key and confirm.
Uploading the reports
To upload the reports into your newly created repository, you need to download our uploading script and execute it. You can download the latest version at https://bash.flowcov.io. If you prefer a fixed version, you can find more information here.
tip
You should not commit the upload script into your Git repository, as it will continuously evolve as we add more features to FlowCov. Instead, you should download it on every invocation of your build pipeline.
To upload all reports in the current directory and all subdirectories, you can execute the following command. Please replace the repository ID and API key with your own. You can find these values in the repository settings.
Customizing the upload
FlowCov provides you with detailed configuration options to control how to upload your reports. You can find all available options in the bash reference.
Exploring the reports
After the upload was successful, you can open our app and log into your account. Click on your repository to see the new build that was created. Click on it to see a detailed visualization of your workflow coverage. You can select the models, classes, and methods to display the data at different aggregation levels.

You can also configure the visualization of transaction boundaries and expressions by enabling or disabling the checkboxes at the top of the page. This helps you understand why your model behaves as it does.